This quest is a continuation of the Great Kourend quest series, where you investigate the corruption within the Kourend Council and likewise discover a decades-old conspiracy. The quest was initially announced in the year 2019. Do you think you have what it takes to unfold the hidden truth? If the answer is yes then just read through the below guide for a smooth journey in completing the quest.
Quest Requirements
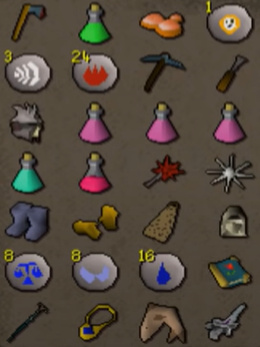
To begin this quest, you must first complete the following quests; Architectural Alliance (mini-quest), The Depths of Despair, The Queens of Thieves, The Ascent of Arceuus, The Forsaken Tower, and Tale of Righteous, and to complete the mentioned quests, you will need to complete Client of Kourend and X Marks the Spot. You will also need to cover the mentioned skill levels: 54 Agility, 52 Thieving, 52 Woodcutting, 50 Herblore, 42 Mining, 38 Crafting, and 35 Magic. Other than that, you will require various items during the quest, such as the ability to cast a Fire Spell, Combat Equipment, Food, Axe, Defense Potion, Volcanic Sulphur, Molten Glass, and Dark Essence Black or a Pickaxe and Chisel.
To make the journey quick and easy, you can choose to bring along the following recommended items; Stamina or Energy Potions, Anti-Poison, Kharedst’s Memoirs, Games Necklace, Skills Necklace, Fairy Ring Access, Xeric’s Talisman, and a Lockpick.
You need to have enough combat levels to defeat Judge of Yama (level 168), Two Assassins of level 133, Lizardman Brute (level 75), Xamphur (level 239), and Barbarian Warlord (level 91).
How to begin?
You can start the quest by speaking to Martin Holt, who can be found east of the Kourend Castle. Once the quest beings, head down to the ground floor of the castle and speak to Commander Fullore, which will also trigger a cutscene. Once it’s over, you will find yourself south of a small house which you will need to check out. So, head upstairs and search the drawers of the room to the east to find a receipt. Read it and go down the stairs (ground floor) to speak to Tomas Lawry.
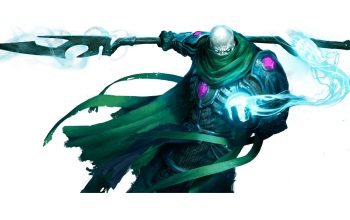
The Judge of Yama
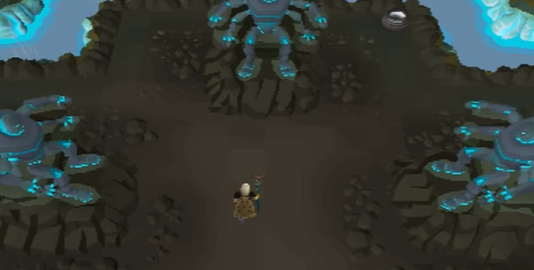
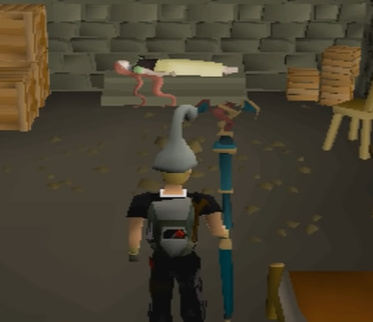
Make your way northwest of the castle to locate the Lovakengj pub. Speak to Fuggy there and then head to Port Piscarillius. At the southeastern corner, you will find Veo’s boat, so speak with the Cabin Boy named Herbert, which will then trigger another cutscene.
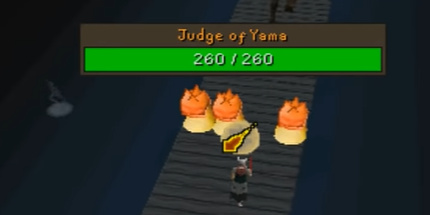
After the cutscene ends, you will be in a battle against the Judge of Yama. The fighting mechanics aresimilarr to Galvek (Dragon Slayer 2), so just dodge the fire attacks and then rush him with melee. He can use both; Protect from Missiles, as well as Protect from Magic, so be aware and not too carefree.
Once you have defeated him, the third cutscene will trigger, after which you have to head southwest to speak with Commander Fullore (outside the castle). Now another cutscene will trigger, and once it’s over, head towards the east entrance from the Kourend Castle to speak to Martin Holt again.
Now you need to get Archeio, who is in the Arceuus Library to teleport you to the Archives. Once you’re there, pickpocket a key from Istoria and check the pick case, which is in the southeastern corner of the room to obtain Rose’s Diary. Now you need to head back again to Martin Holt, and when you speak to him, a note will fall off the diary. Read it and speak to him once again.
The Last Princess
We need to now head to the west entrance that leads to the Forthos Ruins. Speak to Martin first, and then head to the ruins to search the Stone Piles there. It will provide you with a number of combinations, so from there go west and cut down a few vines to pass through, and then use the combination ‘ROSE’ on the panel nearby.

Take the note that you’ve received to Martin Holt, and after that teleport to Wintertodt. Keep your direction towards the southwest to reach the Settlement Ruins and beware of the Ice Giants, Ice Wolves and Ice Spiders there. You can locate Martin in the building that is to the northwest, so head inside the building the defeat the assassin that you come across. Cast a Fire Spell on the ice chunks that are beside Martin and check the melted remains to trigger the panel on the west wall. Read the note and speak to Martin again.
Time to head towards the pub again, but it’ll be the Piscarillius pub this time, which is near the docks. Speak to Martin there and climb up the south pillar to reach upstairs. Check the panel on the western wall and take note of the order that is listed. Now, climb back down and place the statues to bring them in the very same order that you have noted. A cutscene will now trigger, and after that, you must read the note that you receive.
Now head to the shacks that are located west of the Fairy Ring (Code CIR). Within it, search the beds and the other things in the house until you get the inspect option on the crates that are lying in the northwestern corner. Inspect them and head down the trap door.
The Mysterious Mage
Once you’re down the trap door, speak to Kaht B’alam in the easternmost room (under Molch, within the Lizardman Temple). Now, go through the hole located west and then exit the temple. Walk southwest through the Kebos Swamps until you see a bridge. Inspect the egg that is to the southeast and you’ll then be attacked by a Lizardman Brute of combat level 75. You don’t really have to kill it, so just head back inside the temple and hand over the egg to Khat B’alan to receive a key.

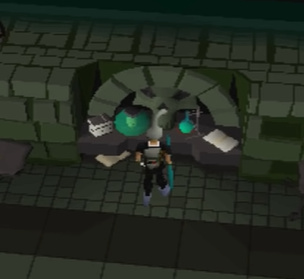
To your southwest, there will be a key hold in the wall, which will unlock a door, and that’s where you have to battle the Spirit Boss named Xamphur. Make sure that you kill the spawned hands to avoid being corrupted, and dodge the falling hands by moving tiles back and forth. It’s the same mechanics as fighting Vorkath (if you have ever faced it before, you will know). You’ll be fine and the fight will be simple as long as you strategically move and keep your Magic protection prayer active.
You’ll be knocked out at the end of the fight, and when you wake up, search the table to your north and read the note. After that, go west of the Fairy Ring to visit the shack again and inspect the crate that is downstairs. This will trigger a cutscene, and once it’s over, speak to Lord Trobin Arceuus in the Tower of Magic (west section of the library). Then speak to Lord kandur Hosidius, who is located in a house southeast of Hosidius itself. Now go southeast of Lovakengj to speak to Lady Vulcana Lovakengj, and then Lady Shauna Piscarilius, who is located in the Warrens beneath Port Piscarilius. Finally, head southeast of the fire chasm and up the ladder to reach the War Tent, where you can find and speak with Lord Shiro Shayzien.
Once you’ve spoken to each one of them, teleport to the Xeric’s lookout to speak with Commander Fullore again, and this will trigger another cutscene. Later on, visit every floor of the lookout and speak to the lords there.
The Council
Speak to the commander again and ask about Lady Lovakengj. After that, travel to Mount Karuulm and go down the elevator to speak to Kaal-Mej-San. Your task now is to make Sulphur Potions, which requires Volcanic Sulphur and Defense Potion, and you can get the mixture enchanted into a shielding potion by handing the items to Kaal-Mej-San itself.
Next, you have to go to the Wintertodt Camp and over to the Doors of Dinh. You need to use the newly made potion on the people and then visit the Barbarian Camp (Kourend Woodland). When you go down the southern ladder, you will come across a level 91 Barbarian Warlord. Defeat it and speak to Phileas Rimor.
Once the conversation ends, head outside and right into the prison that is near the Graveyard of Heroes (Shayzien). Go downstairs and speak to Martin there, and then head back to the graveyard to speak to Jorra (South of the church). An Assassin will appear, so take him out and then talk to Jorra again to receive the Declaration (quest item).
Taking the Declaration with you, head to the Arceuus church and use either of the two staircases to head upstairs for this a kingdom divided guide. Go east and then up the stairs again to locate Mori. Speak to her and give her a Dark Essence Block and Molten Glass to receive a Dark Nullifier in exchange.
Head back to the Chasm of Fire and attempt to go in to trigger some dialogues, after which you need to head to the Vinery in Hosidius. Locate the ‘win barrel’ to the east and pick the lock to obtain the Shayzien Journal.
You need to go back to the Lookout now for this a kingdom divided guide, and when you reach there, speak to each one of the lords again. After that, speak to Commander Fullore to trigger the second last cutscene. Once it’s over, head down the ladder to speak to Lord Hosidius, and then back up to Commanded Fullore again to trigger the final cutscene. This will be the end of the quest to gain access to all the A Kingdom Divided Rewards!
Source: Looking For Cheap Runescape Gold, Items, Accounts, Questing, Power Leveling Service, RSOrder Will Be The Best Choice!